Payment
Authorization Blacklist
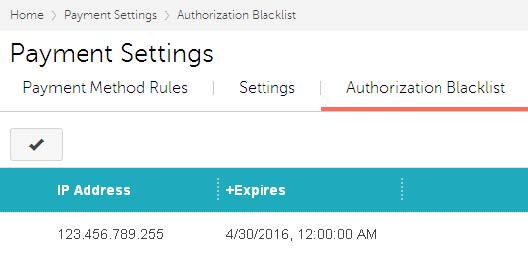
When a customer visits your on-line store, Miva Merchant can see their IP address. The Authorization Blacklist is a list of IP addresses that you aren't going to accept credit cards from. You can add and remove IP addresses from the blacklist, but if an IP is on the blacklist, no credit card from that IP address will be accepted.
There are several ways to add an IP address to your blacklist:
- You can add IP addresses to your blacklist automatically. See: To automatically add IP addresses to your blacklist
- You can manually add an IP address to your blacklist from the Order Processing > Authorization Failures Tab.
- You can manually add an IP address to your blacklist from the Authorization Blacklist tab (see below).
To Manually Add an IP To Your Store's Blacklist
- In the Payment > Authorization Blacklist tab, click Add Blacklisted IP

- In the Add Blacklisted IP dialog box:
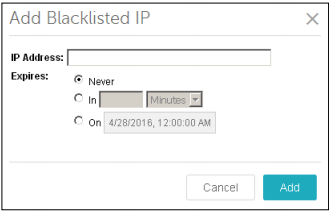
2.1. Enter the IP Address that you want to add to your blacklist.
2.2. Select an expiration date for the blacklist. When the expiration date arrives, the IP address is automatically removed from your blacklist and can once again submit credit card authorization requests to your store.
2.3. When you are finished, click Add.
To Remove an IP Address From the Blacklist
- In the Payment > Authorization Blacklist tab, double-click on a row.
- In the Edit Blacklisted IP dialog box, click Delete. The IP address will be removed from your blacklist and can once again submit credit card authorization requests to your store.
You can also remove IP addresses from your blacklist by selecting a row and clicking Delete
Blacklisted IP(s) .
To Edit a Blacklist Entry
- In the Payment > Authorization Blacklist tab, double-click on a row.
- In the Edit Blacklisted IP dialog box, make your changes and click Save.