Getting Started Guide - Miva JSON API
- API Endpoints
- Authentication & Permissions
- SSH Authentication
- Group & Function Permissions
- JSON Request Format
- JSON Response & Error Handling
- Throttling & Timeouts
- Client Side Requests
- Working With Dates & Times
- Pagination
- Troubleshooting Authentication Issues
Overview
The Miva JSON API allows any external system to both push data to Miva and pull data from Miva. The JSON API is the same underlying functions as the Miva admin to push and pull data via JavaScript. Any external system that needs to get or push data back to Miva should use the JSON API.
Requirements
To use the Miva JSON API you must be using Miva 9.12.00 or greater as well as the 5.32 engine or greater.
API Endpoints
Every store has its own unique API endpoint associated with the domain name. The format will be as follows:
https://www.domain.com/mm5/json.mvc
Note: Some stores use an alternate folder name other than "/mm5" such as "Merchant2" or "/store/". You can see what folder structure is being used under Domain Settings > Site Configuration.
Authentication & Permissions
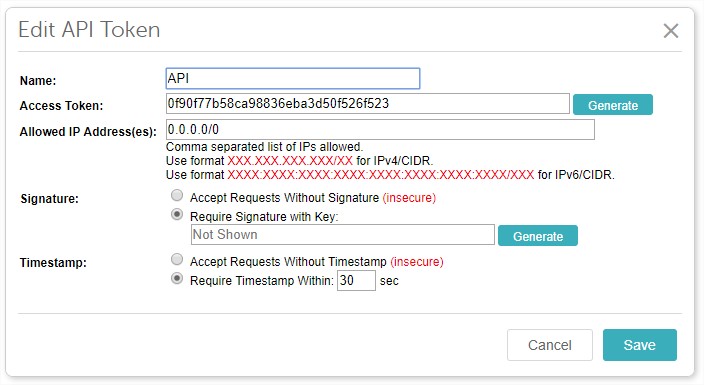
Access to the API is determined by an API Access Token. This token is generated in the Miva admin under Users > API Tokens
Within the access token setting, there are 3 additional levels of security:
- IP Address Whitelist
- HMAC Signature
- Timestamp
IP Address Whitelist
Each access token is restricted to a list of IP addresses you want to have access to make API calls. It accepts a comma separated list of IPs. If you don't have static IP addresses, you can disable it by using 0.0.0.0/0 which will allow any IP address. You may also need to whitelist the short hand for ipv6 whcih is: ::/0. Note: Its highly recommended the IP restriction be used for added security. Only disable this security feature if you don't have way to get a single or range of IP addresses
HMAC Signature
This is an optional but strongly recommended feature to prevent man in the middle attacks on API requests. Miva will generate a Private Key which you then use to generate an HMAC using the message body, where the encryption algorithm is either SHA256 or SHA1. This signature then gets passed in the header of the request with the name of "X-Miva-API-Authorization".
Header Format: X-Miva-API-Authorization: type <access token>[:<hmac>]
There are 3 type options:
- MIVA-HMAC-SHA256
- MIVA-HMAC-SHA1
- MIVA (no hmac present)
3 steps to generate HMAC header
- base64 decode private key
- pass base 64 decoded private key, algorithm type (sha1 or sha256) and JSON request body into your languages hmac, which function as separate parameters.
- base64 encode result of hmac function and pass in header of each request
PHP Example Function to generate header using private key
PHP CURL Example
API Access Token Header
API Access Token Header with No HMAC signature
API Access Token Header with SHA256 signature
API Access Token Header with SHA1 signature
Base64 Encoding: Its very important that once the HMAC is generated it needs to be base64 encoded before being passed in the header. Also the Private Key needs to be base64 decoded before it gets passed into the HMAC function.
Timestamp
This is an optional, but highly recommended security feature to help prevent a replay attack against an API request. When enabled each API request has a max window of execution of 30 seconds from the timestamp passed in the body of the request. To use this feature pass the following parameter in the JSON body:
"Miva_Request_Timestamp" : "1535646272",
The value passed should be a unix timestamp of the time the request was initiated. Miva will then give a 30 second window for that request to be received.
While the timestamp and HMAC signature are optional, both will be required if you have an integration you want listed in the app store.
SSH Authentication
Miva 10 introduces user level SSH Authentication as an alternate way to connnect to the Miva JSON API.
Benefits of using SSH Authentication
- No IP Restrictions
- Since authentication is tied to the user, additional reporting is available about who made the request.
- No need to generate a new API token/signature for each store you want to connect. Just add your SSH public key.
Important: SSH requests require the Timestamp be passed in each request with a 30 second window. Also, the admin user must not be locked out and the
users password must not be expired or set to force to change.
Generate an SSH Key
Miva only supports "ssh-rsa" format SSH keys. DSA, ed25519, and ECDSA are not supported. Below is an example of how to generate
an SSH key:
This will generate both a public and private key file on your local computer. The public key file will have a ".pub" extension and this value should be copied into your Miva user
under: Edit Profile -> Manage SSH Authentication

SSH Authentication Header
Simular to the token/signature authentication outlined above you must also pass a custom authentication header for SSH
Generating SSH Signature
The SSH Signature required to be passed in the header is generated using the following steps
- 1. Pass SSH private key, algorithm type (sha256 or sha512) and JSON request body into your languages hmac function as separate parameters.
- 2. base64 encode result of hmac function and pass in header of each request in the Signature
Note: All our our JSON API SDKs support SSH authentication. You point the library to your SSH key an our SDK will generate the required header.
Binary Encoding Header
Miva 10 introduces a new optional header which you can pass in API requests to enable you to pass in binary data as the payload. If omitted, json data is assumed.
Group & Function Permissions
In addition to being used for authentication, each access token has Group and Function Level permissions. These permissions will determine which API functions they are allowed to run.
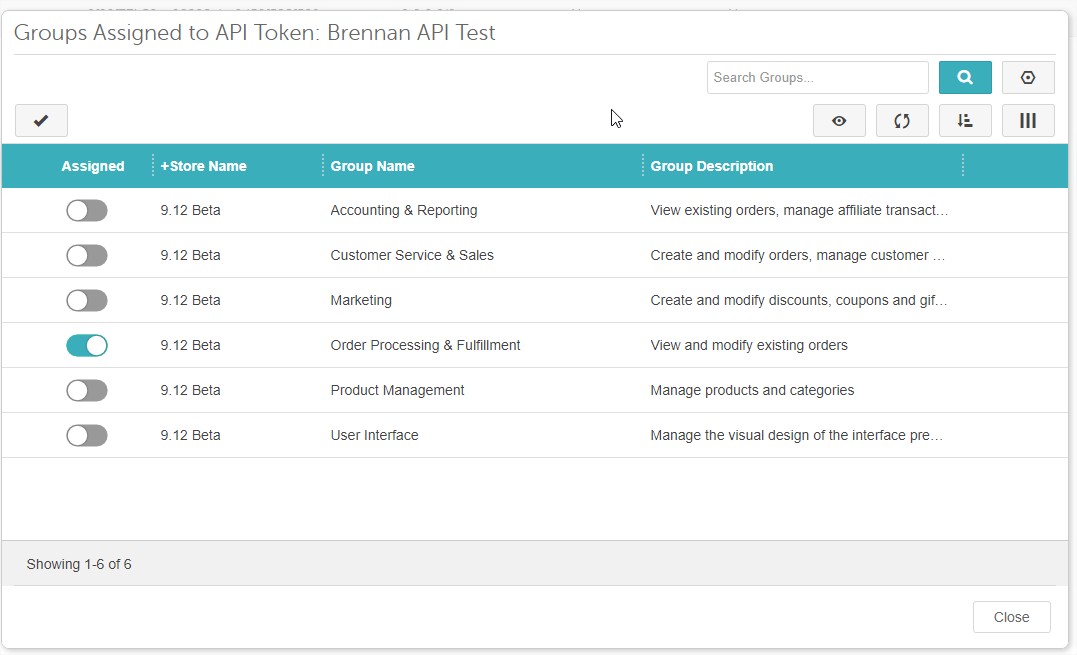
Group Permissions
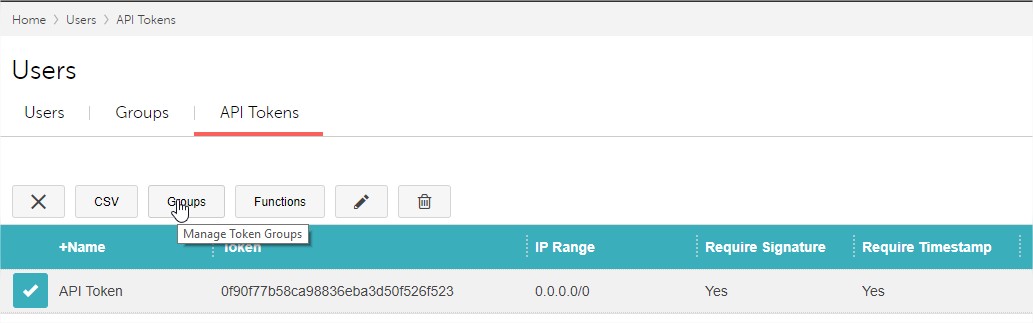
Group permissions allow an access token to inherit the permissions assigned to each individual group. These are the same group permissions used to give to Miva Administrator users. To assign group permissions to an access token, click the name of the API Token on the API Tokens page. From here you can edit API Token settings, Assign Groups, Add Functions.
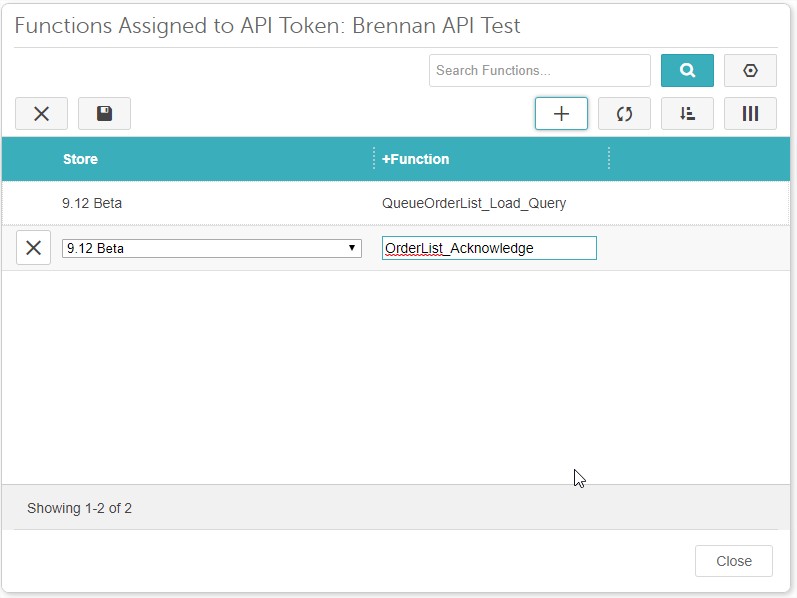
Function Permissions
You can also explicity tie an access token to one or more functions. The full list of API available functions can be found in the left menu. Here you provide whether it is a domain level or store level function and then the function name. You can use Groups and Functions in conjunction with each other to get the correct permissions you need.
JSON Request Format
The Miva JSON API accepts data in JSON format passed in the body of the request. The data sent will be determined by the function you wish to run, and whether you are pushing or pulling data. Please see each function's specific definition on which json data is needed.
Required JSON Data with Each Request
- Miva_Request_Timestamp - (Only required for an integration to be listed on the app store) The unix timestamp from when the request was generated. Miva will only run a request in a 30 second window from this time.
- Store_Code - The Miva store code of the store you wish to execute the function against.
- Function - The function to execute
Then depending on the function you're running, it will have its own required json you must pass to get the correct data out or to push the correct data in. See the API Function Reference Guide for details on all available functions.
JSON Response & Error Handling
All responses to the JSON API, whether it was successful or an error is returned, will be formatted valid JSON.
Success Response
Successful calls return their data as a JSON structure in the following format:
Some success responses will contain additional data. For example, with "OrderItem_Update", the success response looks like this:
Error Responses
Errors are returned in the following format:
Required Fields Validation Error
Some errors will include additional fields with further information about input validation errors:
Example:
Throttling and Timeouts
API Throttling
There is no throttling enforced on API requests. To the server it will appear just like any other http request. Miva will process the request and then return the results back to the client. This does mean that the burden is placed on the developer doing any integration to prevent API requests, inadvertently causing a Denial Of Service attack, because a client made too many API requests.
API Timeouts
The API uses the same timeouts defined the the Miva’s stores mivavm.conf file. These are the global timeouts used across any Miva page for each site. Default timeout in most Miva stores is 60 seconds. You can also increase this timeout when doing bulk transactons on a per request basis by passing the following header:
X_MIVA_API_TIMEOUT
For example lets say you need to push up a big block of tracking numbers using our multicall format, you can pass this header to be a value greated than 60 seconds to avoid a timeout.
Logging
API requests are not logged separately against regular requests. The server's access logs can be used to help troubleshoot any API related issues.
Client Side Requests
The JSON API is not able to be used in untrusted client requests via JavaScript/AJAX. This is because doing so will expose your API credentials in the header of each request. There are special API functions intended to be called clientside without an API key needed. Specifics on these coming soon.
Dates & Times
All date/time fields in the API will return Unix timestamps. You'll need convert the unix time to the proper date format depending on your needs.
Pagination
It is recommended when querying lists of large data sets (products, orders, customers), that you paginate the results to avoid timeout issues and enable more robust data transfer between Miva and your system.
Every List Load Query function in the JSON API supports pagination.
There are two request parameters which enable pagination when querying a list of data:
Count - Count is used to tell Miva how many records you want returned.
Offset - Used in conjunction with the Count parameter for paginating results of large datasets. Default is 0 which is no offset.
Then contained in every response will be two parameters which will tell you how many resources are still left to be downloaded.
total_count - total_count is the total number of records that match your search criteria. Note: this is not always the total records returned. Based on the Count and Offset parameters passed, the number of records returned could be different than the total_count.
start_offset - The starting offset from the total number of products returned in the results.
Pagination Overview
To paginate a list of products, you create an initial request to Miva passing in a count of the maximum number of records you want returned. For example let say we want a max of 100 records at a time. The count parameter would be 100. Then for the offset parameter we pass 0 since we want to start at the beginning.
Miva will then return the 100 records along with total_count and start_offset. Say for example the total count is 250. You would process the total count from the response you recieve and determine that you need to make two additional calls to get the remaining records. They would look like this:
Second Request Parameters
Second Response Parameters
- total_count = 250
- start_offset = 100
Third Request Parameters
Second Response Parameters
- total_count = 250
- start_offset = 200
The results of each call should result in 100 records returned in the 1st call, 100 records returned in the second call and 50 records returned in the 3rd call. You essentially take the start_offset response parameter + count to calculate the your next call's offset parameter. You only stop querying results once the start_offset + count parameters is greater that the total_count.
Troubleshooting Authentication Issues
The following error responses revolve around Authentication and Permissions. Its important to note that if you do not pass the Miva "X-Miva-API-Authorization" header or its name is incorrect, no response will be given.
Access Denied
An access denied error could be for any of the following reasons:
- Invalid Access Token
- Missing Header Type or Type mismatch
- Invalid Content Type
- IP address is not whitelisted
- Access Token does not have sufficient privileges
Access Denied - Invlaid Request Signature
This means that you passed a header type where Miva is expecting a request signature, but you are either not sending one, or the signature is incorrect.
Access Denied - Missing required timestamp
This means that your Access Token is configured to require a timestamp in the JSON body, but you are not passing one.
Access Denied - Timestamp outside Configured Window
This means that your timestamp in the JSON body is outside of the configured time set for the Access Token.
Access Denied - Invalid Content Type
Your request must pass a content type of "application/json"
Access Denied - Invalid Request Method
Your request must use http method type of "POST". GET and other method types are not supported.